
 ___       _____ ______   ________
|\  \     |\   _ \  _   \|\  _____\
\ \  \    \ \  \\\__\ \  \ \  \__/
 \ \  \    \ \  \\|__| \  \ \   __\
  \ \  \____\ \  \    \ \  \ \  \_|
   \ \_______\ \__\    \ \__\ \__\
    \|_______|\|__|     \|__|\|__|
After receiving the board and its components, I soldered everything together, wired it up, and applied 12v from my DC power supply. To my surprise, the small LED indicator for the chip's charge pump lit up and the chip appeared to be functioning.
The MCU of my choice was a Raspberry Pi Pico (RP2040). I used the SimpleFOC library with PlatformIO, and after a bit of trial and error, the motor came to life! It was spinning, but loud and not very smooth.
Here's a link to a video of this initial test, and you can clearly see it drawing just over 2A and 9.5V from my PSU!
The reason my motor was spinning like this was because it was an open loop. The library, SimpleFOC, had no idea where the motor actually was, and so the commutation cycle wasnt properly timed. This caused the jittery motion and weak strength.
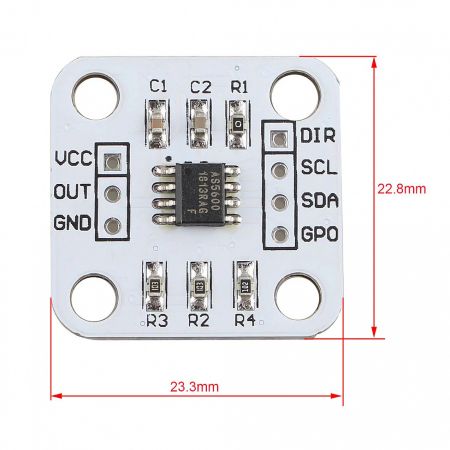
I 3D printed a small mounting bracket to add an AS5600 magnetic encoder and magnet to the motor so I could effectively create a closed feedback loop. After adding this functionality to the program, the motor spun faster, smoother, and with much more torque. The encoder communicated via I2C and was very simple to implement using SimpleFOC's MagneticSensorI2C class.

Heres a link to a video of the motor spinning with the encoder.
After some thought, I've decided to get to work on the next iteration of this project rather than continue experimenting. I plan to look into using ST chips this time, and I have specifically looked into the STSPIN family of ICs. These chips pack together a gate driver, similar to the drv8304, along with an STM32 Microcontroller.
The STM32 is very powerful and has more than enough capabilities for real time motor control. This integrated setup allows for smaller designs that already have most of the necessary connections in place between the gate driver and the MCU.